Tool Rack DIY is about how this architecture firm recently created and installed a tool rack for less than available retail.
(C) Copyright 2021, HOME ARCHITECT, PLLC, All Rights Reserved Worldwide.
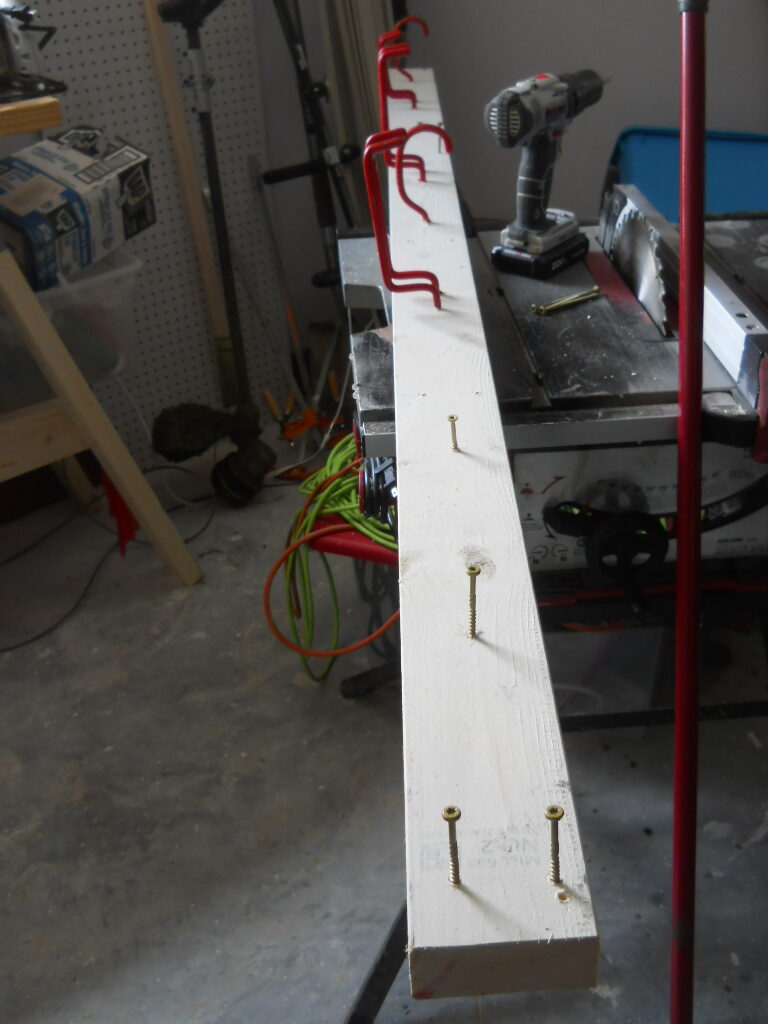
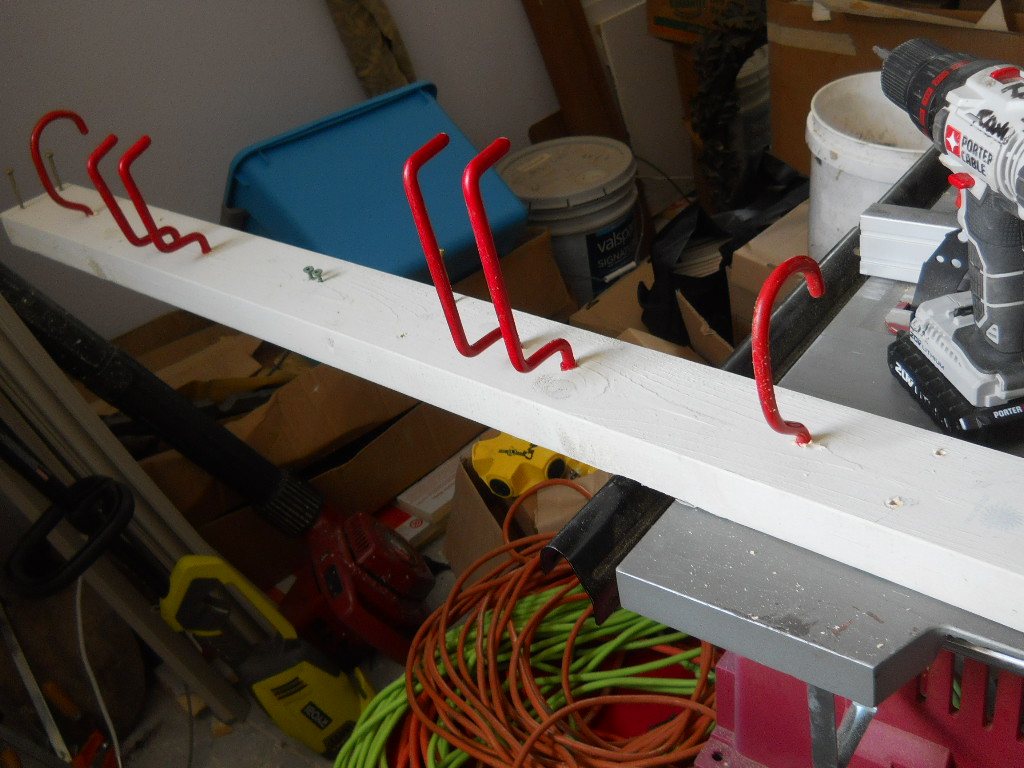
And possibly more heavy duty. Here you can see the light gray painted 2×4. And more than half of the large heavy duty red tool hooks have been screwed into the board, along with 3-1/2″ long star drive screws. The sets of double star drive screws are to go into the wall studs (through the drywall). 1-1/2″(2×4 thickness) + 1/2″ drywall = 2″ of screw shaft length = 1-1/2″ of screw embedment into the wood wall studs. Don’t recommend any less than that.
Which begs the question: How do you know where to pre-screw those? In other words: how do you know where the wall studs are?
Answer: use a small stud finder tool that has a magnet on a swivel. You make a mark on the wall when the magnet swivels firmly, indicating that a nail is buried in the drywall there. Nails through drywall should only be located at stud centerlines. Find at least one nail above where you are going to install your tool rack, and at least one nail below. Then grab your level and hold it vertically, centering on those nail locations, making sure your level is plumb. Draw a light pencil line on the drywall. Do this at each stud, along the wall where you are going to mount your tool rack.
Now then, do NOT wait to try to drive in the screws and tool hooks after you have it laid against the wall. That’s difficult to do. Better: place the tool rack horizontally on the wall, approximately level (rest a small level on the top surface of the tool rack), then lightly draw vertical lines over the other vertical stud location lines you already have drawn on the wall. Now: move your tool rack to a level work bench and drive in the star drive screws (2 per stud line), until the sharp end of the screws just barely begin to emerge on the rear surface, like the 2 screws you see closest to you in the above photo. Suggest wearing gloves. Now: all your wall mounting screws are already aligned and held in place in your tool rack board.
Also, if you are using any screws to mount some tools on your rack, drill them in at this time as well. However, do not expect small screws to support shovels and other heavy equipment safely. Better to use engineered components, like the red tool hooks available at Jennings Building Supply that this Architect purchased. Be careful when spacing the tool support hooks to have adequate clearance between adjacent tools and the tool rack board wall mount screws. Just hold the tools onto the face of the rack and see that there is room for the tools on each side of that tool. Good planning to avoid an “Oh nuts!” later.
TIP: have a nice assortment of drill bits in your workshop and a full battery in your portable drill. Predrill the holes for the red tool hooks slightly smaller than the threads of the hooks, so that you can easily hand-turn the tool hooks into place with your hands. Do not try to hand set the tool hooks without these pilot holes.
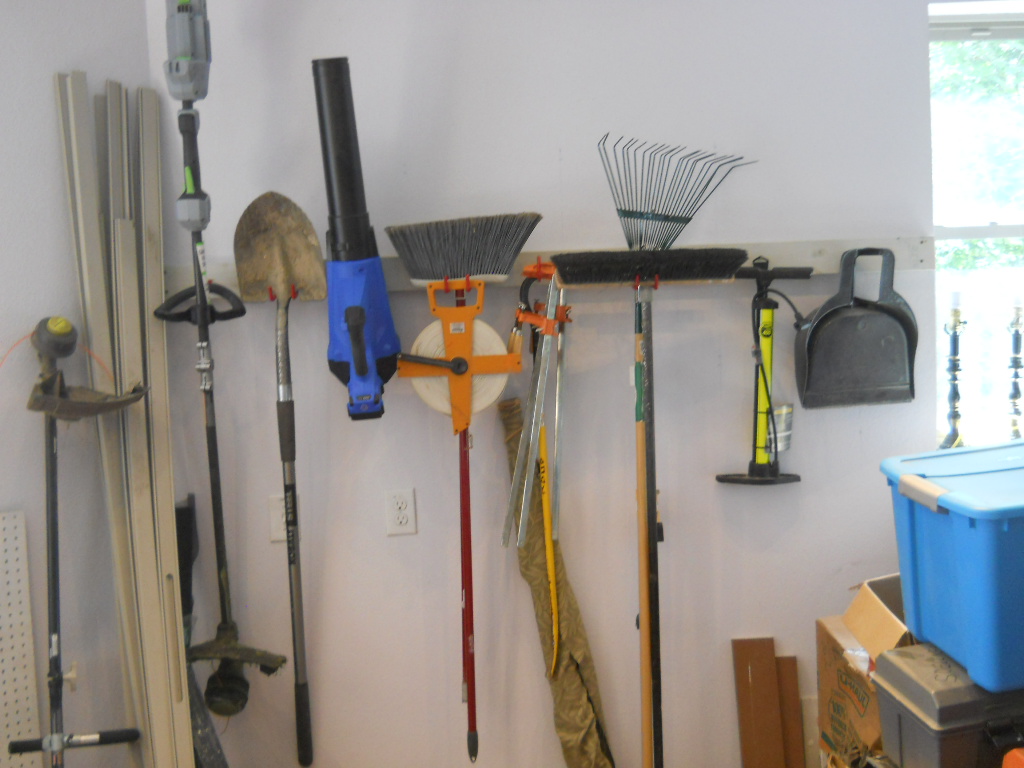
Okay: The moment of truth: hold up your assembled tool rack complete with tool hooks and mounting screws up to the wall, where it is to be mounted, and align with the vertical stud lines you previously drew in light pencil, checking to make sure your pre-drilled mounting screws align with the wall stud lines. Okay? Okay. Place a small level on top of the tool rack and level the tool rack. Drive home ONE mounting screw. That’s going to hold the whole assembly in place. Check the level. You can adjust one side up or down with a light tap of an ordinary carpenter hammer way off to one side or the other, as required to level it. All level? Okay. Drive home all the other mounting screws. YOU NOW HAVE YOUR VERY OWN CUSTOM TOOL RACK, READY TO RECEIVE THE TOOLS YOU PLANNED FOR IT. Here’s ours:
It has been 2-1/2 years waiting to do this. Hallelujah.
This Architecture firm bought supplies from Jennings Building Supply:
2x4x8 (8 feet long): $4.38 (#2 spruce). However Lowes has utility grade for $3.98 but Jennings was closer and the 2×4 straighter).
8 tool hooks: $16.92 (commercial grade, large, screw-in type with red rubber coating).
Leftover light gray paint: $0.
———————————–
$21.30
If you check around online, you’re probably going to find 36″ long versions for twice as much. It’s just not worth buying the retail tool racks. And this DIY version is 8 feet long and heavy duty. We actually had to cut off about 16″ because the window and corner of the wall prevented us from using the entire 8 feet in one place. Was still a great deal and not hard to prepare and install. Took about 1-1/2 hours starting with painting the board.
ENJOY.


