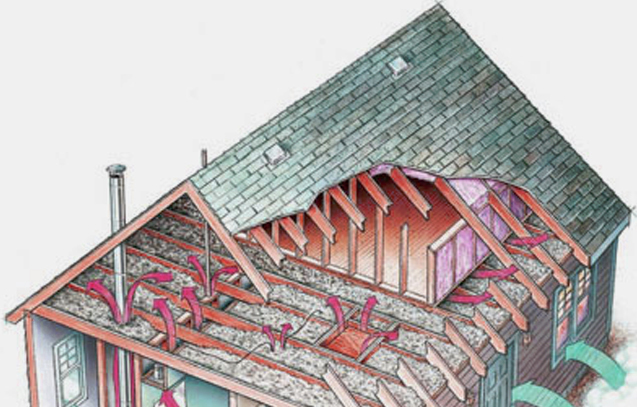
Sealing your attic against air leaks is one of the most important methods to obtain a more efficient energy barrier.
Our firm is one of the few residential architectural companies that is an Energy Star Partner. We are schooled in special techniques that we use to help make your residence tighter. Let’s start at the top and come down from there.

ATTIC: get into the attic and turn off any lights. If you have air coming into the attic, you should be able to see the light. This is not unusual. Beware: if you have normal fiberglass insulation, you Should be venting it, Above it. Don’t plug air vents that allow the top of the attic insulation to vent. If you do, you could seriously damage the wood in your attic. The question is, do you have a finished attic or is it really an attic?
Install insulation behind kneewalls, behind finished room in the attic, if any. Per latest Energy Code, you are supposed to have an air barrier, preventing outside air from coming in through the attic and under the insulation, so look along the top plate of your walls and make sure they are cover with full thick batts of insulation (if you happen to be using fiberglass batt and most houses do). Covering the tops of your walls helps them to become much more efficient. However, before you do cover them, take along a can of expanding foam insulation (polyurethane is the most thermally efficient, but messy). Your contractor should squirt some of this expanding foam (not too much) into any holes for wiring and plumbing and other penetrations in your top plate and into the annular space around other ceiling/attic penetrations, where appropriate. Be careful not to drip foam insulation through such holes down and onto finished surfaces. For fire prevention, these holes should have been already sealed by the builder, but if that did not happen, then you can take care of that now by having another followup contractor make these improvements. Be careful. Spray foam can damage lots of things, including you. Wear gloves. Once again: don’t use too much. The foam continues to expand, more than you might think.

Look for gaps in your attic insulation and plug them. If necessary, your insulation contractor can use insulation accessories like “Tiger Teeth” to hold down the insulation along the edges, so that outside air cannot blow under it. Provide an Air Barrier (which can even be gypsum board, along the edges of your insulation, between the inside and outside air spaces, to keep outdoor air from getting under your insulation. We have seen this happening (air getting under ceiling insulation) and it is a critical prevention measure. Plug holes that you see between pieces of insulation, making sure that it is tight, for a continuous thermal barrier.
For instance, a terrible waste of energy is through recessed light fixtures punched through ceilings that have attics above them. Architects and others in the design and construction process should avoid them. Any such ceiling fixtures and any fixtures to be In Contact with insulation should be “IC” rated so that such contact will not cause a fire. However, recessed light fixtures through attic insulation violate the sanctity of the thermal barrier. Better to use other lighting options, which at a lower elevation will easier to change anyway, making lower fixtures a more maintainable solution. If you do have recessed light fixtures through an insulated attic, then you should coordinate with licensed insulation contractors who know how to insulate in accordance with building code. This will typically allow such recessed fixtures to be “tented.” Tenting a light fixture in an attic requires a critical distance from the light fixture, which light be 2″ or more, to help prevent heat build-up, per code. This tenting is typically accomplished using rigid insulation duct board pieces that are glued together with liquid foam insulation and further foamed to the top side of the ceiling.
There also may be vertical chases coming up into the attic from the house below, and such chases may have no insulation and no separation from the attic space. In essence, these chases will act as “chimneys” for air, coming through them and into the attic. So any cracks and crevices through them and into your heated and air-conditioned house interior will be drawn through them and wastefully exhausted into the attic. Also, the air temperature in the attic will try to normalize and mix with the air in such chases, through natural movement of connected bodies of air, which functions much like fluids in a glass of water. So, such chases should be sealed with appropriate solid insulating materials, which, under the correct circumstances may include rigid insulation board, completely covering them and sealed to them from the underside with liquid foam insulation for an airtight barrier. Essentially, you build a box of rigid insulation around such intruding light fixtures, then cover that box over with the main attic ceiling insulation. Rarely is this done properly. It takes the quality control of concerned people like the architect, general contractor or owner to go up into attics and look at how things are being done to verify this quality. Gaps are your thermal enemy in your insulation barrier. Seal them all.
Make sure that your vented soffits are clear and able to ventilate. Unfortunately, the Energy Star website mislabels “soffits” telling people to push insulation over them. This is Wrong! The soffit is the horizontal underside of your exterior roof overhangs. The soffit is Outside of your insulation. It is there, typically with perforated soffit material or cut-in slots with screens (to keep out pests) to provide much-needed air circulation Above your attic insulation. So, keep insulation in attics back from soffits. You would just be wasting your insulation there, anyway, because your ceiling over interior space in inboard of your soffits.
Make sure that there are exhaust vents, like a center high Ridge Vent, which is fairly standard these days. You may find some older homes with gable end wall louvers and that works, also.
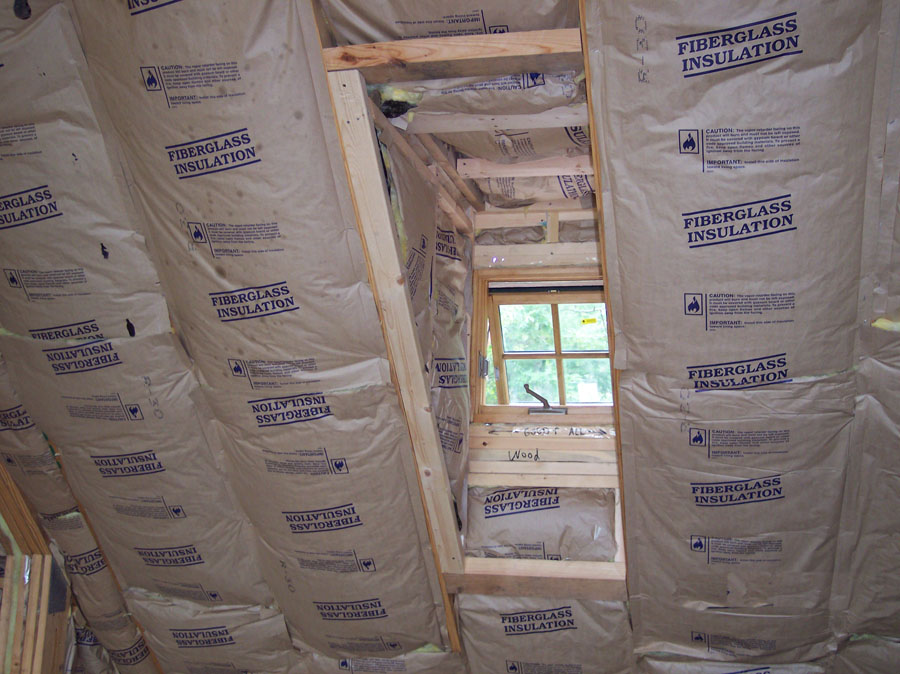
If you are in the lower 48 United States, your attic insulation will likely come with a kraft paper vapor barrier backing, in which we happen to believe. Some local codes do not require this in some regions, but we believe that it is a good practice. NEVER use polyethylene: it causes mold, from moisture condensing on it. The kraft paper backing does a good job of being a “smart” moisture barrier, letting water vapor through when it should and keeping it in when appropriate and in the correct season. This vapor barrier should also be turned toward the warm side of the attic in winter, which means: facing down, toward your inhabited spaces. Personally, we like to see the side flanges of the kraft paper unfolded over the bottom of the roof structural members and overlapped with the next row of insulation kraft paper. This also helps to serve as an inner air barrier, partially blocking inside air from flowing up through cracks and into your attic.
When you think you are done insulating in your attic, look around. Can you the top surface of any ceiling materials? If so, cover them with insulation, with the kraft paper side turn down toward them. Try to obtain a cohesive, uniform total insulation cover over the ceiling, everywhere with no gaps anywhere.
At your attic scuttles, glue rigid high quality insulation to the attic side of them, so they remain in place after your leave the attic. Otherwise you will have a huge thermal hole, the size of your scuttle hatch after you depart. This rigid insulation should be thick, to provide the equivalent R-value of your main attic insulation. This should be anywhere from R-30 to R-49 these days, depending on your location on the planet. The edges of this scuttle should have compressible vinyl weatherstripping that is put into compression when the scuttle door closes against it. This is to prevent your interior air from exhausting up through undetected cracks around the scuttle.
The BEST way to prevent attic sealing problems is to have it designed and constructed properly in the first place. Such is the focus of residential architecture firms, as the author of this online article.
For more information about energy efficient home design, contact; Rand@HomeArchitects.com www.HomeArchitects.com 1-828-269-9046.

2 Comments
Karen Woodruff
7:17 am - November 11, 2015Is it normal to see it raining through a crack at the edge of the attic floor by the chimney? I see water damage, but we just had the flashing fixed and now it is no longer raining in our bedroom, but we are afraid it is still causing damage and we need to get that fixed before repairing our walls.
rand
8:10 pm - November 12, 2015No Ma’am, that is not right. You should never be able to look directly outside through walls, framing, flashing or other materials, from the interior of your house or attic. Our firm did Not design that for you. Whoever did and the Contractor should meet you there and see what you see and you should ask that the Builder fix that, along with the water damage. Ask them to use proper flashing per NRCA and SMACNA details.