Weed Control Around Your House is about how to stop or retard weed growth around landscaping on your land near or away from your residence.
HOME ARCHITECTS ® investigates new materials and methods to assist Clients and others to know what works best for a variety of issues involving residential architecture. Weed control can be unpleasant, particularly if you are bending over or on hands and knees plucking them out one by one. Also, you can spend hundreds or thousands of dollars over the years on harsh toxic chemicals to kill weeds that can possibly harm your other plants and your pets, children and you.
This architectural firm has a better way: this can be incorporated into their specifications when they design your house, or can be implemented later, even at existing grounds around your house. For best results, ask your Architect about this BEFORE you install decorative plantings around your residence. That way, you can avoid EVER having to worry about weeds again, assuming that the manufacturer of the discussed product works as they profess.
It may be best to approach this sequentially, so that you can understand how to best manage this. It is a 9-step process.
Weed Control Around Your House
Step 1:
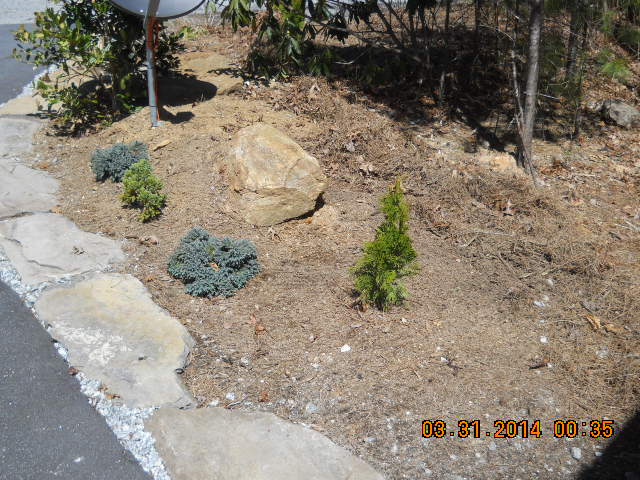
EXISTING SITUATION.
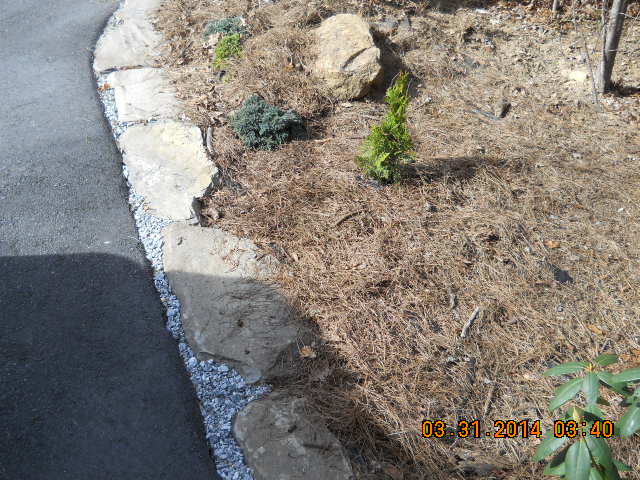
Here you have your existing planting zones (or, even better: None). This was the situation in very early spring, BEFORE any weeds started growing. This way, no existing weeds had to be removed.
Click the image above to see a Green Architecture Index for other “green” subjects by this architectural firm.
.
The time to start is late winter to very early spring, BEFORE new weeds can start growing.
Step 2:
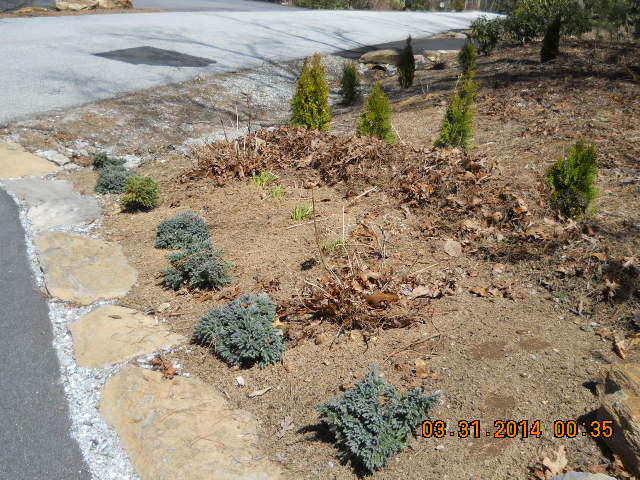
RAKE BACK EXISTING GROUND COVER.
Rake back your existing mulch, pine needles, or forest ground cover that you want to reuse.
Click the image above to see a GLOBAL WARMING article and what you can do about it.
.
.
.
Step 3:
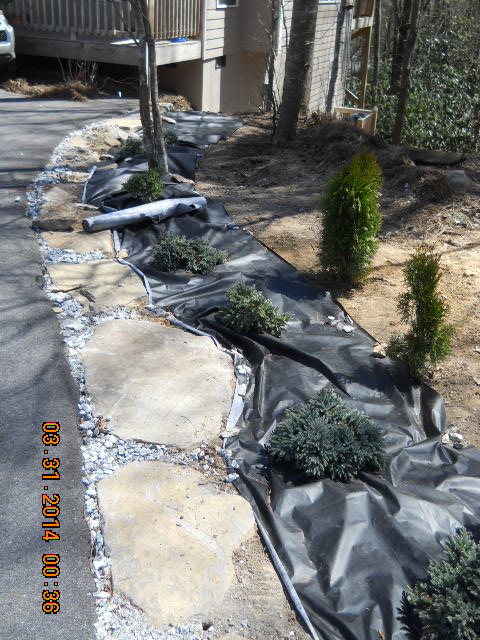
UNROLL THE WEED CONTROL FABRIC.
Unroll the weed control fabric over the plants and ground you want to protect from weeds. Start with just one course to begin, especially if it is windy. The black side should be up. Stick around and read the whole article. We will provide you with more information about this particular product at the end.
Click the image above to see a different article about Sustainable Architecture.
.
.
Step 4:
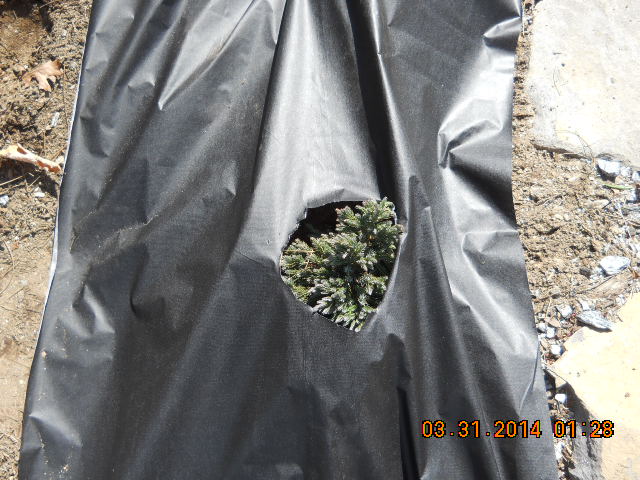
CUT OUT HOLES FOR YOUR PLANTS.
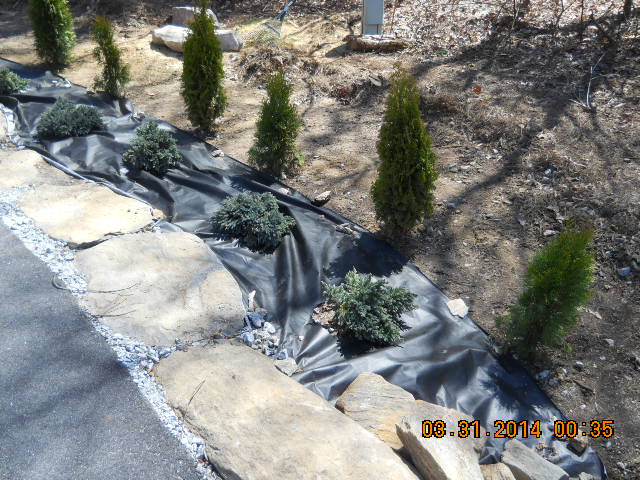
Note if you don’t have any plants yet, Great! You can cut holes through the weed control fabric later, exactly where you want to place your plants. For this particular example, there are existing plants. Although the manufacturer’s instructions indicate to “make an X,” we found that can tear the fabric larger than necessary. We found that making an approximate circle, just wide enough to allow you to pull the leaves and limbs of the plants through it formed a much tighter circumference around the plants, which will yield a better weed control.
Click the image above to see another article about Health Home Design.
.
.
Step 5:
PULL THE WEED CONTROL FABRIC SMOOTH.Well, as smoothly as you can. If the wind is blowing, you will need to start laying down some rocks here and there to keep the fabric in place. Abut adjacent materials, like paving, landscape rocks and other planting beds (like grass) as tightly as possible, and whenever possible, install weed control fabric UNDER adjacent materials to result in a weed free edge between your planting bed and the nearby treatments.
Click the image above to see another article about Natural Materials and Organic Architects.
.
.
Step 6:
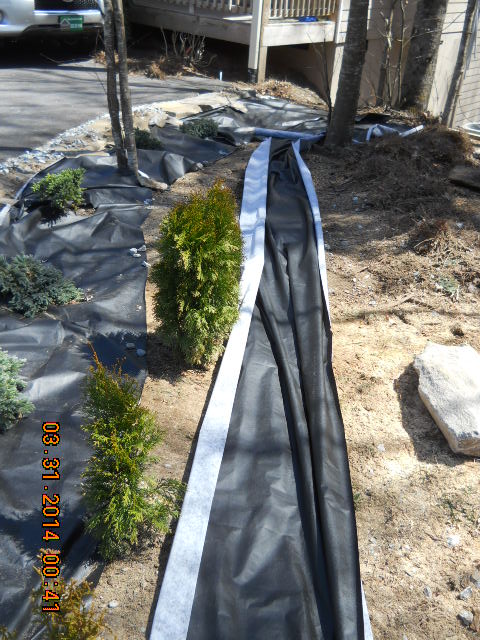
LAY DOWN ADDITIONAL COURSES OF WEED CONTROL FABRIC.
If you have more than a 3′ wide zone, then you will need to lay down another course, for the length of the planting bed/area which you wish to keep weed-free. In this particular example, there as about a 5′ to 6′ wide zone, about 40′ long.
Click the image above to see another article about Indoor Air Quality and how houseplants can help you with that.
.
Step 7:
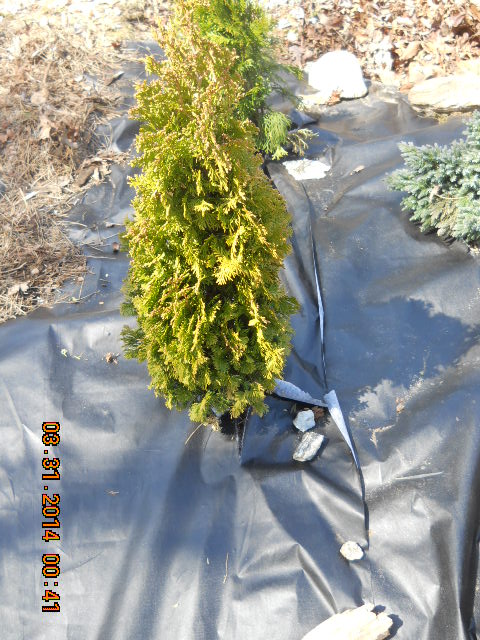
OVERLAP THE ADJACENT COURSES OF FABRIC.
You just can’t leave open joints in the control fabric. Weeds would grow up between them. You need to overlap the joints, according to the manufacturer of the fabric: 3″.
Click the image above to see another article about the economic payback for “going green.”
.
Step 8:
BALLAST & UV CONTROL/BED COVERING.
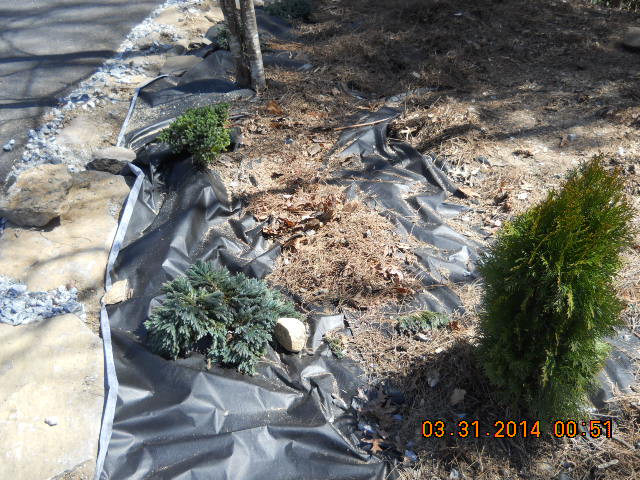
The manufacturer of the weed control fabric has an amazing guarantee, but the also insist that you cover the fabric with 2″ of mulch or pine needles. Otherwise, the sun’s ultraviolet rays can damage the material over time. We found that using some pine needles and forest ground cover after placing, in spots along the length of the bed served as ballast to keep the fabric laying down. The manufacturer’s instructions mentioned “garden staples” to secure the fabric to the ground, but we didn’t see those in the packages, nor were any garden shops convenient during our installation, so we relied on the pine needles primarily.
Click the image above to see another article about 25 years of green designs.
.
.
Step 9:
APPLY REMAINDER OF DECORATIVE GROUND COVER OVER THE FABRIC.
Now the remainder of pine needle bales, or the other materials you remove in the beginning are reapplied over the top of the weed control fabric. Remember: the manufacturer said you need at least 2″ thick to protect the fabric from UV rays.
Click the image above to see the Top 5 Green Design Methods in residential Architecture.
And: the result should sort of be anti-climatic: it should look very much like when you started. Assuming you began before you had any weed growth. And that is the objective: to conceal the weed control fabric so that all you notice are your nice, decorative plants.
PROTECTION:
Note: always protect yourself with eye goggles, gloves, and face mask when handling the sort of materials you see in this article and if you aren’t particularly skilled doing manual labor: don’t. Hire qualified contractors to do this for you.
OUTLINE SPECIFICATION:
Weed control fabric used in this example:
Manufacturer: Dalen Products, Inc. (Knoxville, TN)
USA: Company indicates that this product is made in the USA.
Source: WalMart.
Size: 3’x 125′.
Product Name: Weed-X.
20 year Guarantee: See manufacturer’s literature for their claims.
Purpose: for use in permanent landscapes around trees and bushes, and along paths and walkways.
Construction: Dual layer: a top weed control layer that appears to have some sort of asphaltic coating (although we are speculating), and a lower bottom layer that is white, called the “water wicking” layer.
Manufacturer claims that roots won’t penetrate above or below.
Actual chemical composition of the materials is not known and does not appear to be disclosed in the product literature that comes with the roll of fabric.
UPDATE: 2 YEARS LATER: this particular material has appeared to degrade and is prone to tearing after this timespan on the ground. This firm now is using a larger more commercial filter fabric: SRW Products “Weed Control Professional” (6’x100′ rolls) 15 year material, according to manufacturer, polypropylene.
Architect reference: Rand@HomeArchitects.com 828-269-9046
tags: weed control around my house, custom, cashiers, highlands, lake toxaway, glenville, sapphire, hendersonville, whittier, asheville, cullowhee, franklin, sylva, atlanta, post and beam, timber
