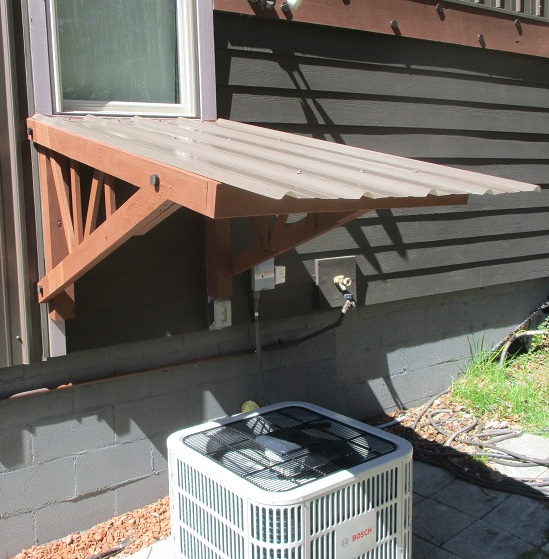
HVAC Outdoor Heat Pump Cover is about how this Architect firm devised, designed and built an exterior cantilevered roof to protect an expensive new piece of equipment.
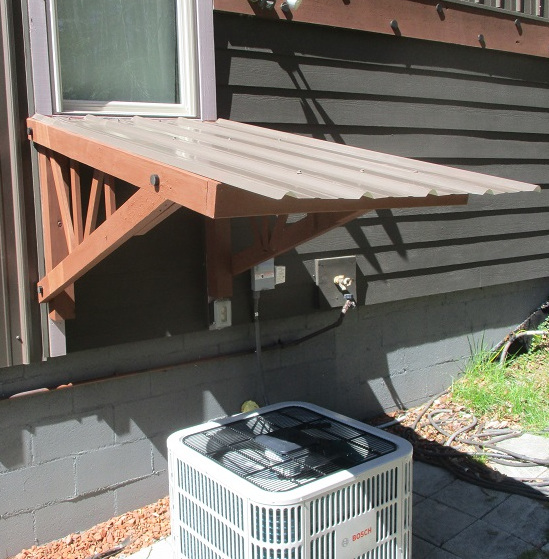
Above is the result^
Below is the process that led to it:
The Architect-Owner spent over $20k upgrading to a new high-efficiency HVAC system, including a high-end variable speed inverter exterior heat pump. See Bosch 2.0 unit above. Most information indicates never to enclose an outdoor A/C condenser or heat pump, and that is correct. However, if you have no walls and only a roof, at a significant distance up above the heat pump, then you would not be enclosing it, but rather protecting it from daily rain, snow and sleet. Which may extend the life of the equipment. Kind of like parking your car in a garage or carport.
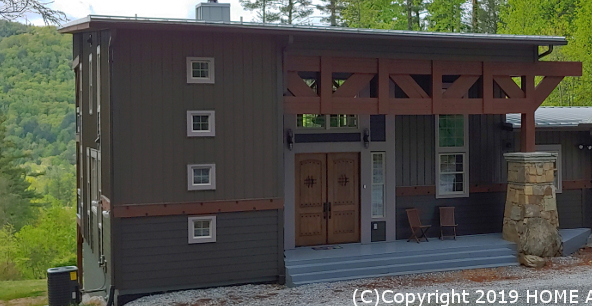
Now then, artistically, one doesn’t want to install a tacky piece of plywood held up with a couple of posts especially onto the side of an award-winning architect-designed custom house in a popular region for high end mountain residences. Which might be the initial obvious solution. But not for HOME ARCHITECTS®. The company looked at the overall composition of the house and rook its cue from the existing huge truss on the front elevation.
Color, structural component, details, materials.
Then the Architect of course wanted to protect the expensive outdoor heat pump but have any sort of roof element enhance the existing design. So, the idea was created to make a new roof support off the left side of the house, below one of the bathroom windows, and have it be a truss-like cantilever with no support posts at all.
WORKSHOP PREPARATION
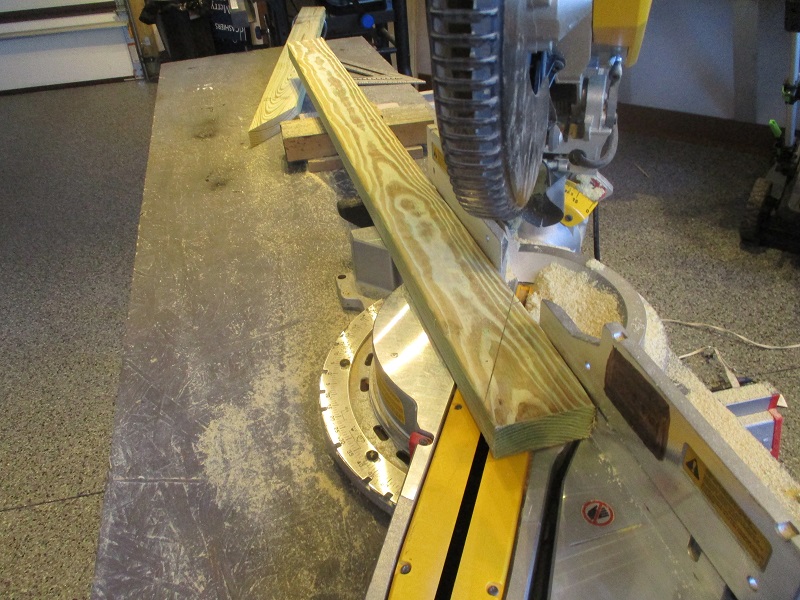
The existing DeWalt compound miter-chop saw was essential.
This allowed for controlled, steady, straight cuts to the new truss top and bottom members at 15*.
Architect made the entire new cantilevered roof & structure of about $85 worth of new PT 2x4s and a few new screws, and the rest of the materials, including the metal roof itself were left over from the construction of the main house in 2018, including most of the screws, stain, struts and miscellaneous parts. The finished cantilevered roof assembly appears as if it cost more like $6,500. It’s amazing what some good design and planning can do. Just one of the reasons for an Architect to design a custom home and its additions.
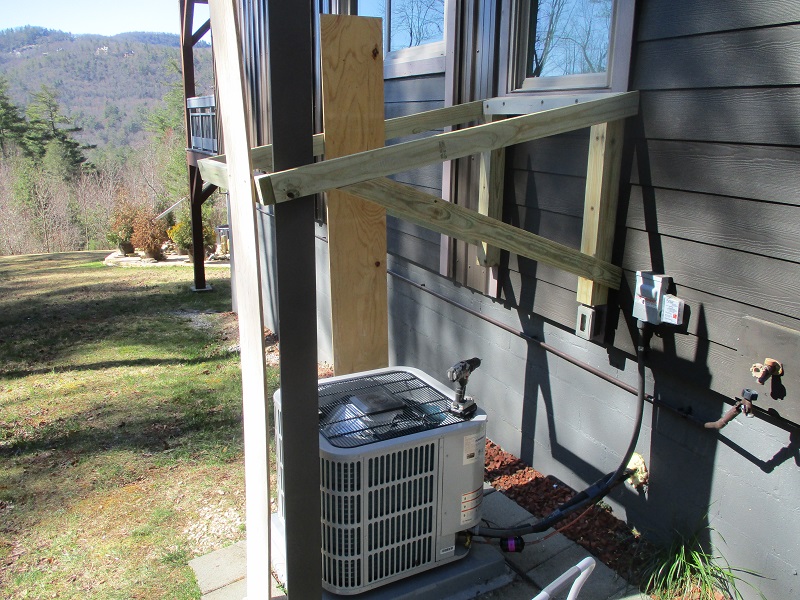
INITIAL FIELD ASSEMBLY
1 PT 4x4s into window subframing sill and sides.
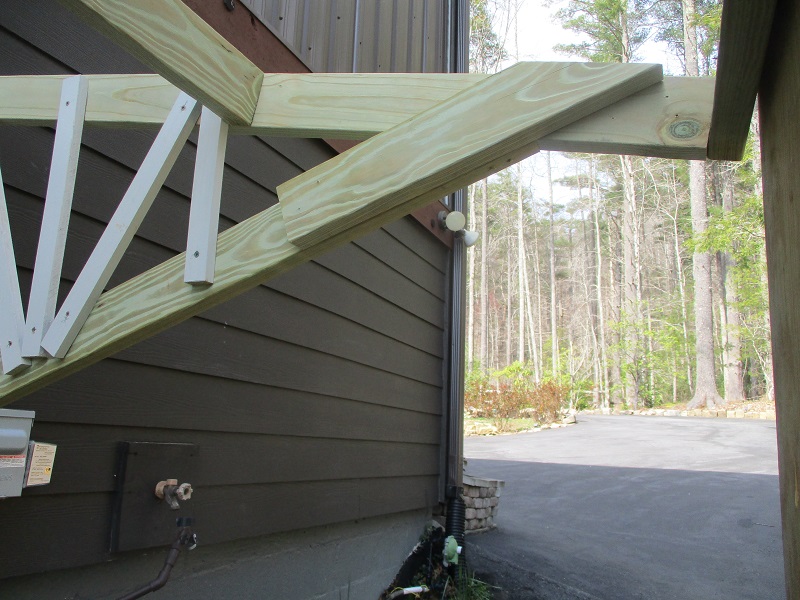
2 Top and bottom PT cantilevered truss arms. So that the roof will be 4 feet or more above the HVAC equipment.
3 Temporary vertical members to support the truss arm side until they are connected.
4 Checked levelness and square.
SCREWS & INTERNAL FRAMING ARE ESSENTIAL TO SUCCESS
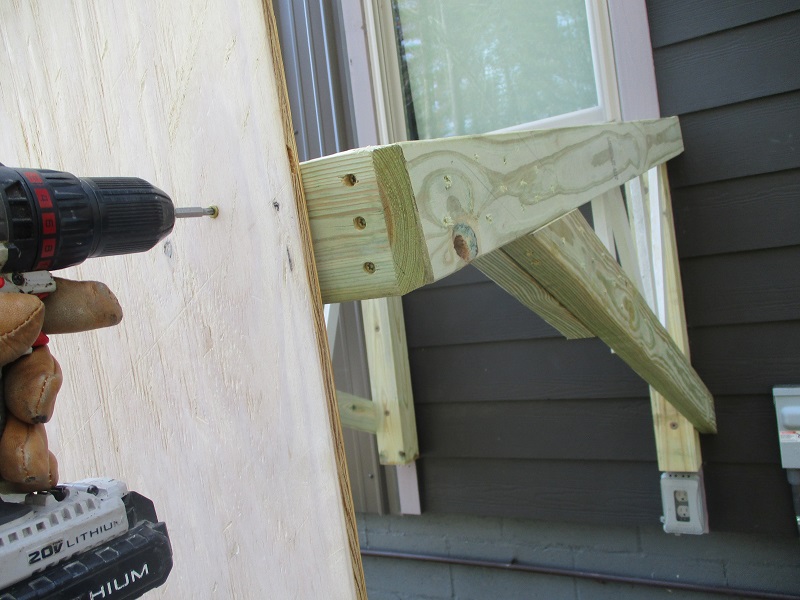
Timber screws with recessed heads are important to the construction.
So are framing members built into the original house wall, to be able to resist the eccentricity of the dead weight and live wind loads on the new cantilevered feature. See your Architect.
ARCHITECT-OWNER MOVED THE VARIOUS TEMPORARY VARIOUS SUPPORTS TO ALLOW FOR CONNECTIONS
FABRICATED AND INSTALLED CONNECTOR BLOCKS & DIAGONAL STRUTS (either decorative or structural)
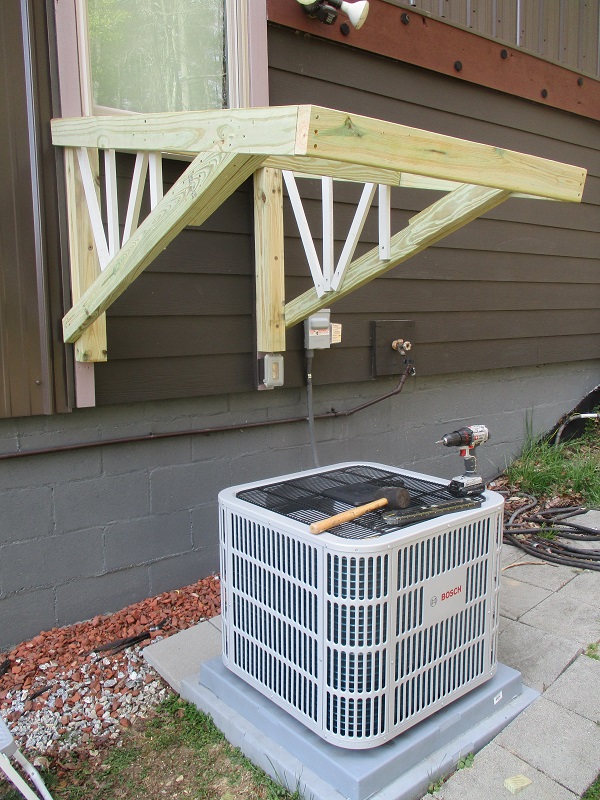
And so here we are at this rough framing stage (above), with the temporary vertical supports removed.
At this point, also comes the installation of sealant to key locations.
STAINING OF SUPPORTWORK
Exterior solid color stain protects even PT better, and doesn’t need to be sanded when recoated some year.
Note: it would be better if the support work was stained before installing, but sometimes with all the fitting required, that’s not always easy to do.
METAL ROOF INSTALLATION
Owner had left over “burnished slate” factory enamel painted screw head screws (dark brown), matching and used for the main brown metal wall siding of the original house. So these were used to secure the previous metal wall siding used as a new metal roof over the new cantilevered structure over the heat pump.
DOWELS/TENONS/FINAL
While not essential, upper and side flashing could be provided and installed to trim things up a bit and keep some of the precipitation from the top and sides. Although: it is Pressure Treated wood with a heavy coat of solid stain, and the entire structure is open and outside, mainly intended to keep the majority of vertically falling snow, ice and rain off the majority of the heat pump, not to try to hermetically seal it.
This HVAC Outdoor Heat Pump Cover is an unusual feature for a house. Most Architects, Contractors and Owners just put that expensive equipment out there in the snow, ice and rain and let it corrode and short out the increasingly complex circuitry and other components of the heat pump. Yes: there is a very complex micro-circuit board in this equipment. Which is why the HVAC subcontractor behaved responsibly and installed a surge protector at the disconnect 2 feet away from the heat pump. That’s a good precaution. And so is this HVAC Outdoor Heat Pump Cover. Ask your Architect for help with this for your next custom house project.

