Hey…That sounds about as exciting as watching paint dry, right? Well, if you enjoy paying others to keep digging out the leaves and limbs and dirt from your gutters every year, go ahead. This post is probably not for you. It is fall again, and you know what that means: leaves are going to fall all around and over your house, clogging your gutters, if you don’t have some sort of debris protection system installed.
If you don’t particularly enjoy cleaning your gutters yourself, usually about twice a year, and taking your life in your hands, every time you set foot on a tall ladder, then perhaps this post Is for you.

We are talking about installing economical gutter guards for the most standard seamless gutters that many homes in America have installed. I measured my gutters and they appeared to be about 6″ wide.
The sales guy at Lowes thought I probably had 5″ wide seamless gutters and that I just got a false reading due to the installation brackets for the gutters possibly spreading the gutters a little wider. I think my gutters are really 6″.
Doesn’t matter. This product we are looking at today seemed to work just fine, and had adequate width, even though it appeared that my gutters might be about an inch wider than the “standard” 5″ width.
The product I ended up using is called: “Sheerflow Gutter Filter” by LB Plastics, Inc. of Mooresville, NC. As it turns out, this is a well thought-out simple gutter filter, designed to be easy and quick to install into standard residential seamless gutters in just about 2 minutes per 3′ long section. No tools required. Sounding better all the time, huh? Except for getting yourself up there. Be careful on your ladder.

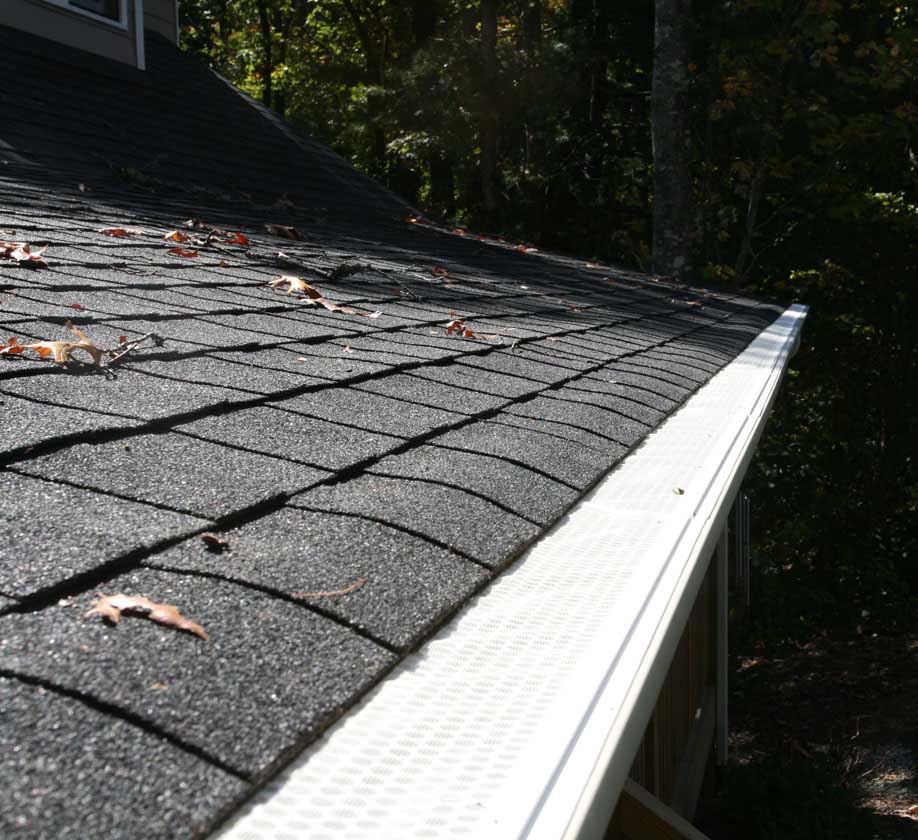
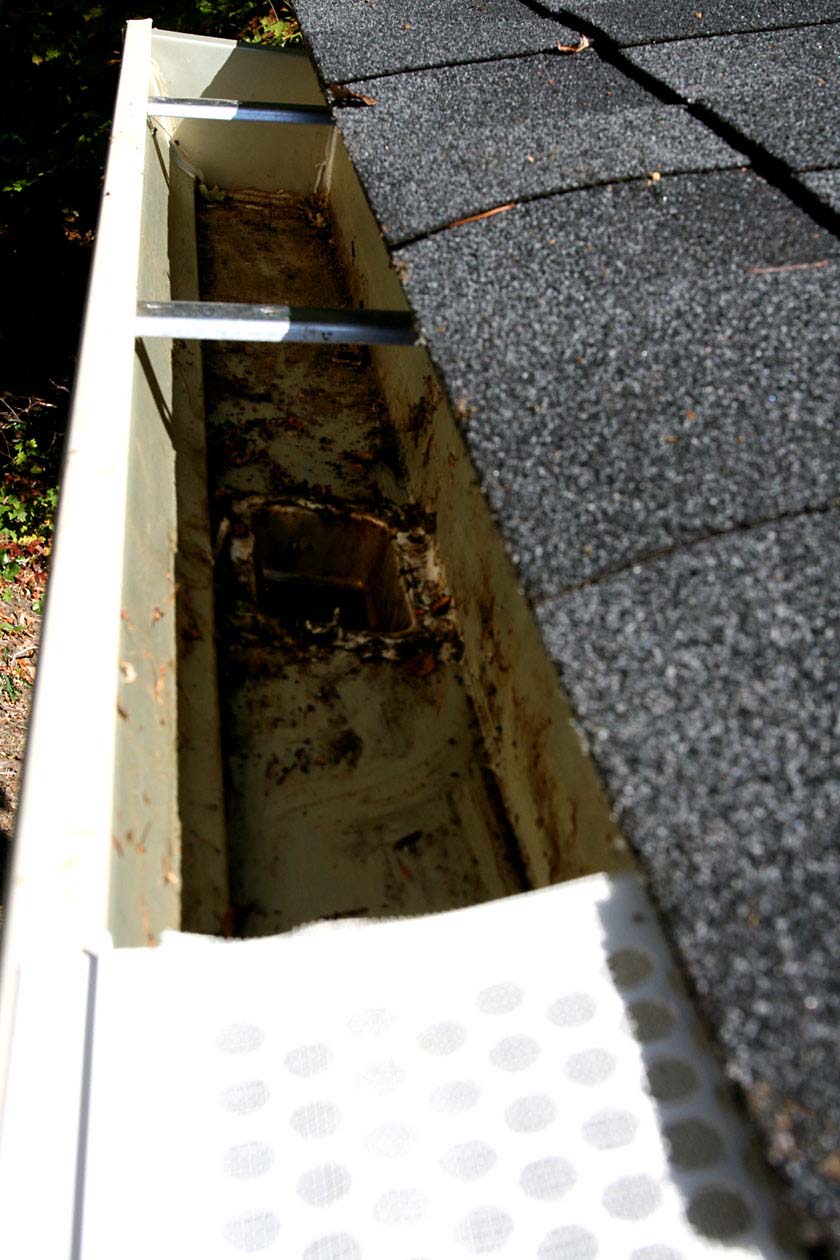
I should have saved one piece before I installed all the sections I purchased (from a Lowes) and taken a photo of the end section, so I could better explain how the gutter filter clips onto the gutter. I’ll do my best to with words and the couple of shots of the installed sections. The Gutter Filter is mainly a flat piece of vinyl (it might be PVC), however there are subtle changes in its section that really make it functional. For instance, one edge is beveled, to make it easy to slide under the outboard inch or two of your roof shingles. Do this slowly and easily so you don’t crack your roof shingles.
The outside edge of the Gutter Filter has a slot that slides on to the reverse bend of your seamless gutter. It engages very easily and took me only a couple of minutes per section. I installed about 36′ of it (12 sections) in about a half-hour, working off a 6′ tall step ladder. I started each section by overlapping each next piece of gutter filter section about 2″ over the end of the previous one, to allow me to tuck the starting inboard edge up under the roof shingles. Then I gradually angled the rest of the 3′ long gutter filter section under the outboard inch or so of roof shingles, then I angled the far end of the gutter filter outboard slot to engage in the reverse bent edge of the gutter top edge. Then I slid the gutter filter sideways, angled, carefully engaging the remainder of the outboard slot onto the metal gutter edge, pulled it off the last couple of inches of the previous section, then slid the new piece to abut the previous one.
The Gutter Filter has holes in the face of the panels, perhaps 1/4″ in diameter, through which rainwater can flow down and into the gutter below. On top of the Gutter Filter is a layer of some kind of plastic screening that has been glued to the top face. Fortunately this gets tucked under the shingles, along with the top edge of the Gutter Filter. However, I am a little concerned if this screening will remain adhered to the face of the gutter filter when subjected to wind, rain, snow, ice and time. If it doesn’t, then I guess I will still have 1/4″ holes blocking leaves and other debris that is larger than 1/4″. Hopefully anything smaller will get washed away down through the downspouts. We’ll see if the top screening lasts. It appears kind of delicate. This entire Gutter Filter appears to be well conceived, with the possible exception of the delicateness of the top screen layer, which could probably be improved with some more thought by the fine folks at L.B. Plastics.
The product is downright cheap in terms of cost, and it looks sturdy enough to last a good long while. Only time will tell. Also, hopefully water will find its way through the screening and holes and down into the gutter. The whole purpose is to allow for the rainwater running off the roof to get into the gutters, without all the other junk, like leaves, so that I never have to clean another gutter.
Take my word for it: Even though I am an architect, licensed in multiple states throughout the USA, and a Licensed Home Inspector, I am not very good at personally building things. That’s why God made Contractors. I just wanted to see how hard this would be. And it turned out that it can be fairly easy and economical. I think I paid about 2 bucks per gutter filter section x 12 = $24. Not bad, for the front side of the house. I got just enough to see if it would work. It does. Now I need to go back to Lowes and buy some more to finish off the rest of the house. Probably another $50 should do it. Not bad. I can’t imagine what I would have had to pay a handyman to do that. I may, however, need to purchase another extension ladder to get to the higher gutters around the back side of the house.
I previously had expanded wire metal mesh on gutters on another house, that arched up and back down. Each piece had a couple of hinged attachment clips. They were scraped off each year by sliding ice and snow from the roof during winter. They don’t work very well. I got tired of putting them back on every year. That is why I am trying something else this time. Hopefully this new variety will stay put.
Be careful out there, folks, especially when you are on a ladder of any height at all. Wear gloves, too. And our company does NOT recommend that you did this yourself (don’t try this at your house, kids!). Hire a roofing pro to do this. It’s not worth your life to save the paltry few bucks you’ll need to pay someone younger, stronger and more experienced at doing this (and with workers compensation insurance).
Final Note: having said all the above: the way my firm details this condition: We set the top of the gutter down at least 1/2″ below the bottom of the drip edge flashing, so that if the gutter overflows, it won’t dump all that water into your roof sheathing and rot it. Rather, we detail and specify that your Contractor is to trim the gutter guard edge (the one without the engagement slot) so that it snugly fits into the gutter, then fasten down with a screw of the same material and finish at the gutter support brackets. Use more support brackets if necessary, to properly support the thin plastic gutter guards so they don’t deform too much and admit debris. But: you’ll probably just need to have our company design your next house to really do things correctly.
